
In this article we will kick-off series about using Amazon web services and try to explore the possibilities of developer tools such as CodeCommit. Eventual goal is to have a full continues integration and delivery system using AWS. This article is the bare starting point so if you are already quite advanced you might want to look up the next articles which explore creating pipelines in detail.
As for all Amazon services you will need an AWS account. You will get 5 users per month for free. The limits are 50GB/month storage, 10k git requests per month and unlimited repositories. This is going to be more than enough for our project of exploring this service.
Lets get started.
Create repository
First we will create a repository.
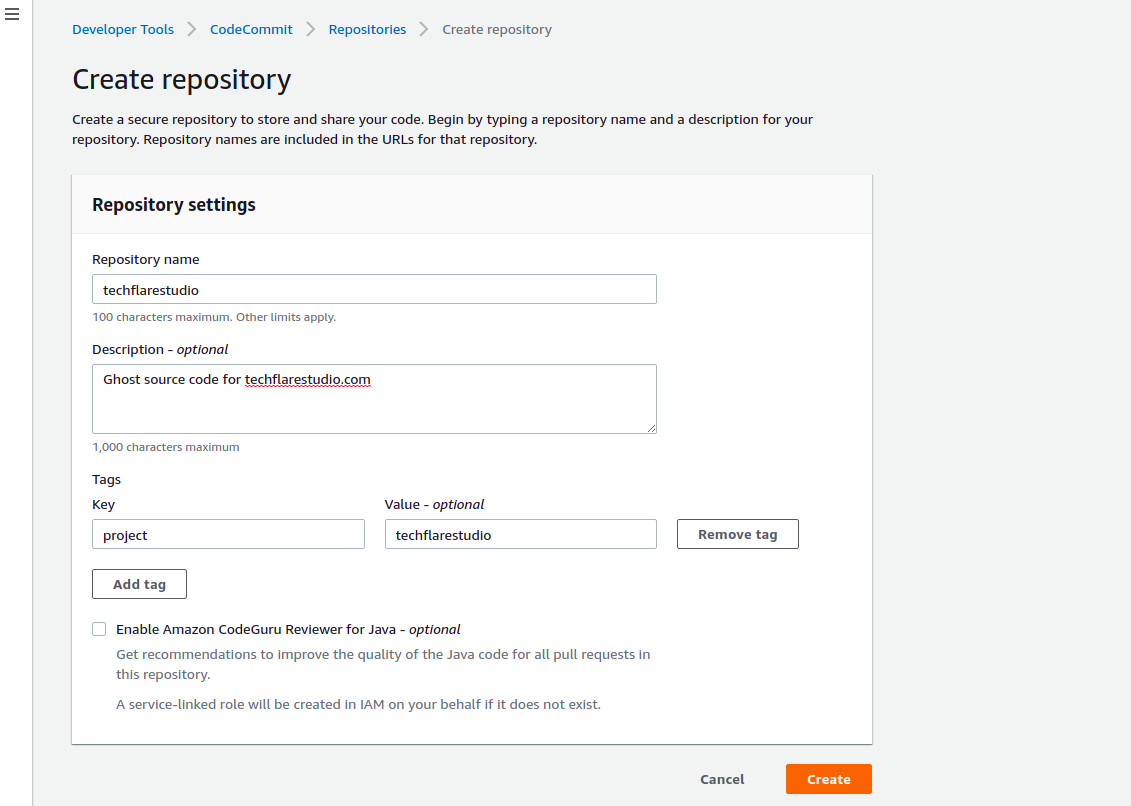
We will use our techflarestudio Ghost source code.
Set the remote
We will set the remote for our code using this command:
git remote set-url origin https://git-codecommit.eu-west-1.amazonaws.com/v1/repos/techflarestudio
Verify that the remote has been added:
git remote -v
You should see the something like this:
origin https://git-codecommit.eu-west-1.amazonaws.com/v1/repos/techflarestudio (fetch)
origin https://git-codecommit.eu-west-1.amazonaws.com/v1/repos/techflarestudio (push)
Setup Git credentials
First make sure that your IAM user has permissions to use CodeCommit. To do so add AWSCodeCommitPowerUser policy to your user. You can read about setting up here - https://docs.aws.amazon.com/codecommit/latest/userguide/setting-up-gc.html .
Next you will need to setup either SSH or HTTPS credentials for your IAM user. To do so you must follow the guide above. Basically if you want to use SSH connection (suggested) you will need to upload your SSH public key to AWS.
Alternatively you generate HTTPS credentials in your IAM user account. After you generate the credentials make sure to save them somewhere safe as you will be able to download these credentials only once.
Push the code
Now that we have our remote repository setup and we have the credentials we can push our code to CodeCommit.
git push origin master
Once the code is pushed you will be able to see your code in AWS repository
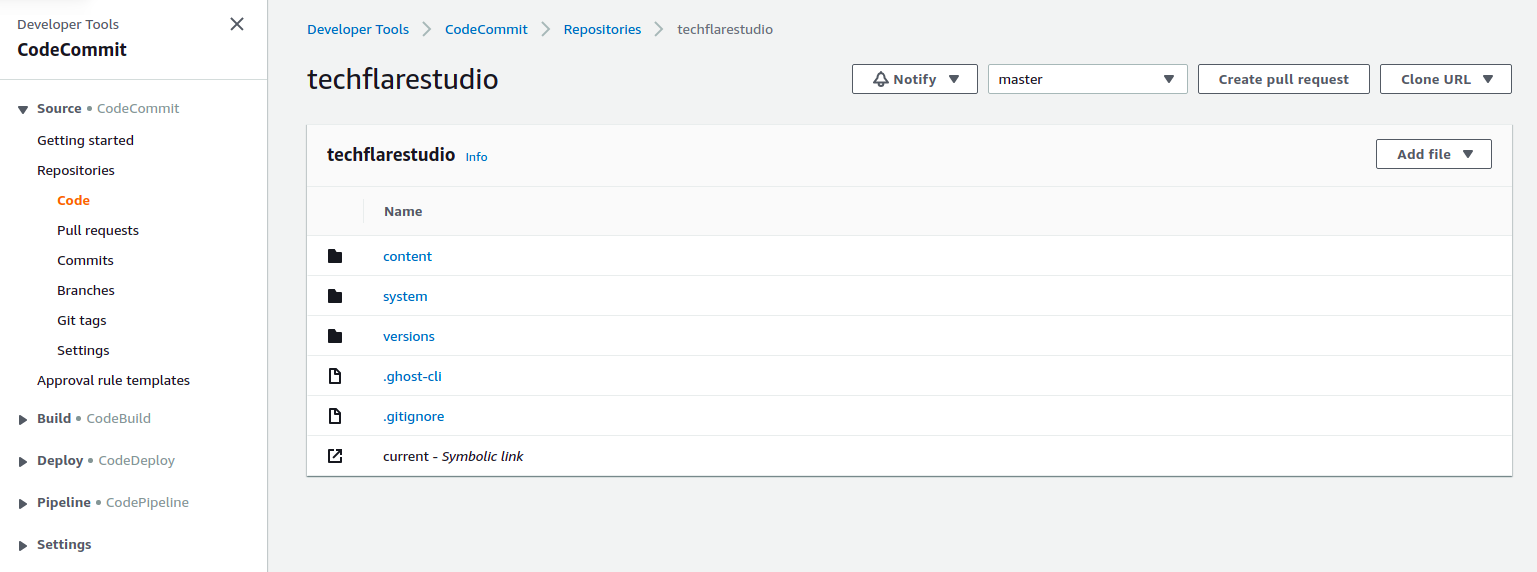
That is it for this article. We have created the first repository, setup credentials and pushed the code.
Next we will explore the many features and cool things we can achieve using CodeCommit. This will include creating notifications using CodeCommit developer tools, ability to create and review pull requests. Eventually we will also go deeper in connecting with CodeBuild and CodeDeploy.
Let us know if you have any requests for further articles.